Buying Craft Knives: An Experts Guide
Crafting is by no means a new trend, with some disciplines dating as far back as the 1800s. In recent years, however, crafting has received a huge resurgence of interest, with people of all ages embracing the headspace and sense of achievement that hobbies such as papercutting, model making, textiles and marquetry present.
Social media platforms such as Pinterest and Instagram provide the perfect forum for showcasing different types of crafting and have undoubtedly helped bring these long-founded arts into the public eye. As a result, crafters can gain inspiration, exchange tips and ultimately share their passion with like-minded hobbyists.
The right tools for the job
With such a wide variety of crafting inspiration out there, it can be difficult to know where to start. The good news is, with the right equipment it couldn’t be simpler to begin crafting. This guide will share top tips and expert advice on the fundamental tool required for the majority of crafting techniques–the stainless steel craft knife.
To find out more about the role a craft knife plays across different art and crafting disciplines we sought advice from a range of respected experts in the crafting world: papercutters John Speight and Christine Green, textiles designer Claudette Cooling and modeling expert Miel Reijnen.
Within this guide you will find top tips and advice on:
- Choosing the right type of craft knife and blade
- Buying, maintaining and storing your craft knife
- How often craft knife blades need replacing
- Essential equipment for crafting
- Expert advice on getting started
Meet the experts
John Speight

Papercut artist
I've been a professional papercut artist since 1990. I am self-taught but come from a family with a tradition of silhouette profile cutting. Although I'm the third generation in the line of silhouette artists, I chose not to cut profiles like the others, and instead decided to create my own style.
Christine Green
Papercut artist and graphic designer
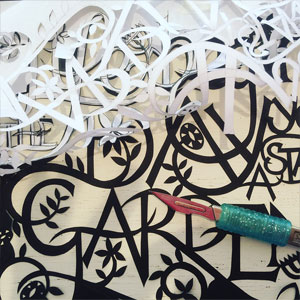
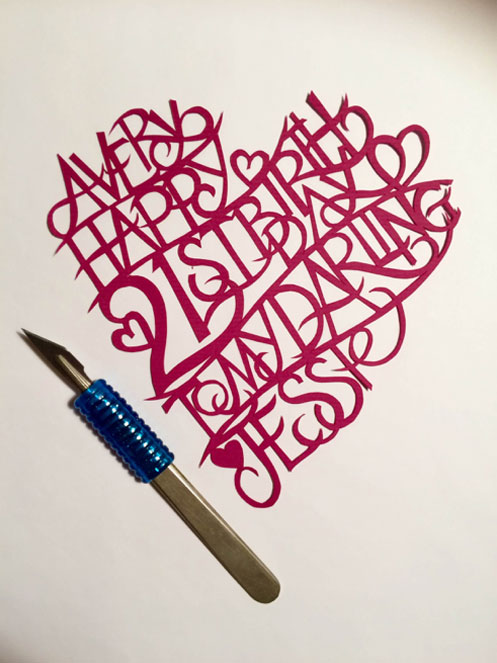
I am a graphic designer with a life-long love of lettering. I have been cutting paper for many years in one form or another, from animation and graphic artworks to three-dimensional fold-outs. I design and cut out witty and charming observations using free hand-drawn typography and I regularly run creative papercutting courses—I never cease to be amazed at what my students come up with.
Claudette Cooling
Textiles designer
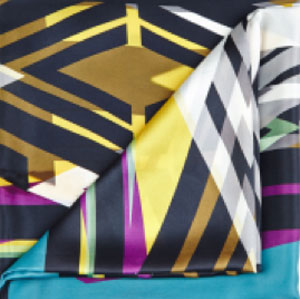
I own and run a small accessories business, The Cool Line. The Cool Line delivers beautifully finished, fashion and lifestyle accessories with a cool geometric edge. Accessories include digitally printed neoprene clutch bags and statement silk scarves, designed to sit as style statements within any wardrobe.
Miel Reijnen
Modelling expert
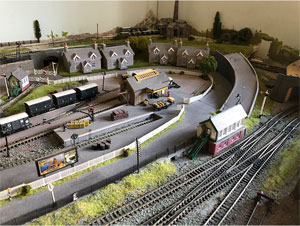
One 2 z Modelshop is a young but dynamic supplier of model train related products in the Netherlands. As One 2 z modelshop is run by seasoned modellers we understand the needs and requirements of both hobbyists and professionals. Alongside specialising in model trains, we also supply a wide range of modeling tools to modellers, industry and artists alike.
The importance of a craft knife
Despite the many different tools and gadgets on the market, the experts were all in agreement that the craft knife is the most important tool that they use. Also used as surgical blades, craft knives offer a much cleaner cut than a standard utility knife, enabling the user to perform extremely detailed, precision work.
Although their crafting techniques naturally differ, there are many similarities in the ways the experts use their craft knives. Read on to discover how the simple craft knife can help to bring such intricate works of art to life...
How important is a craft knife for your particular type of crafting?
John: While other papercut artists only use scissors—or scissors and a craft knife—I only use a knife, and so a craft knife is 100% important to my work.
Christine: I am a papercutter with a particular love of lettering and I couldn’t function without my trusty Swann Morton craft knife.
Claudette: I regularly use craft knives for the manufacturing of my handmade accessories as well as prepping any business stationery needed for events. I would not use any other brand other than Swann Morton after using this brand for the best part of a decade.
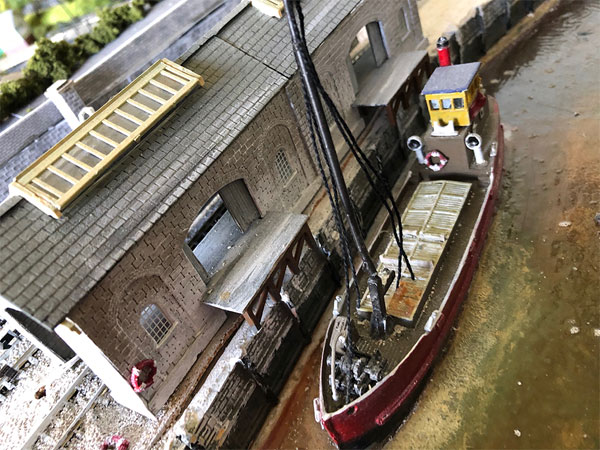
Miel: We use knives a lot when building models, either from kits or scratch-built. In general, a knife will be the most used tool for working with cardboard, wood, plastic, resin or similar materials. When repairing or converting trains I would also use screwdrivers, pliers and a soldering iron.
What blades and handles do you use in your day-to-day work?
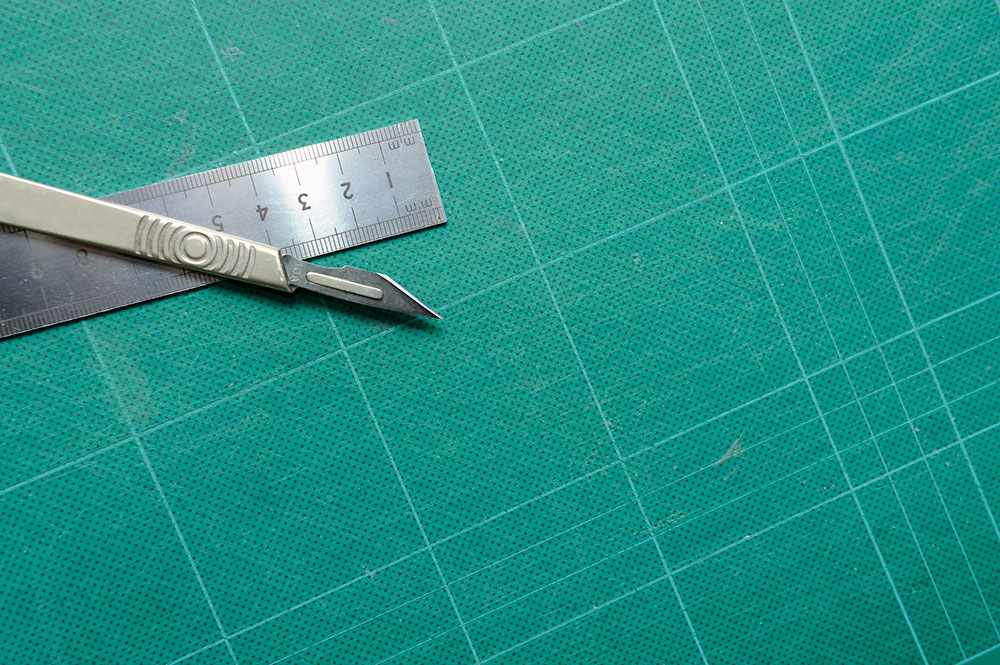
John: I only use a Swann Morton scalpel, specifically a No.3 handle with a 10A blade. I would always recommend a craft knife with a flat handle for papercutting. When using a round handle it is difficult to know if the blade is slightly turned and not straight. If you cut with a slightly off-line blade it will pull the paper as it is cutting and possibly tear your work.
Christine: I use a combination of a number 3 handle and 10A blades – the handle was my father’s, he was a graphic designer and the handle could be at least 50 years old! He always used number 11 blades, which is what I used for years but I had to switch 10A’s when I went to college and the college shop didn’t sell 11’s only 10A’s.
The best craft knife combination for papercutting is a Swann Morton number 3 handle and a 10A blade
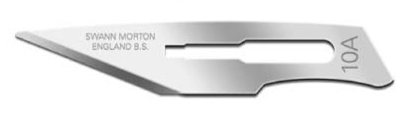

Claudette: For my small accessories business I mostly use 10A or 11 blades.
Miel: I do quite a lot of demonstration building of cardboard (Metcalfe) kits on shows and these need a straight blade for cutting straight lines, therefore, I would use an ACM no.2 or ACM no.11. When detailing I use an ACM 28 because of the ‘hollow’ blade, and when cutting free form I prefer a rounded blade for greater flexibility.
Different blades are suited to specific model making tasks:

ACM no. 2 is ideal for cutting cardboard

ACM no.11 is also good for model making with cardboard
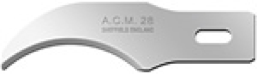
ACM no. 28 is useful for detailing.
What do you use as a cutting surface?
John: I use a cutting mat on an angled drawing board. The angled board makes it easier to look straight down on your work. Cutting on a flat table is much more difficult.
Christine: These days I use self-healing cutting mats—I like a slightly softer one—but before they came along I used the backs of sketchbooks and layout pads and scraps of mounting board.
Claudette: I have a selection of self-healing cutting mats ranging in size A1-A4.
Miel: I usually use a self-healing cutting mat—preferably size A2, as this gives a lot of working space.
Do you use other cutting tools alongside a craft knife?
John: No, I only use the Swann Morton Scalpel. My personal preference is to choose one tool and master it, rather than have a large range of equipment that I'm forever trying to get used to. So, twenty years or so ago, I chose a Swann Morton scalpel with a 10A blade and have continued with that to this day.
Christine: No, I don’t use any other cutting tools, I don’t need to.
Claudette: Yes, I also use a rotary cutter and varying brands/types of fabric/embroidery scissors.
Miel: Occasionally I will use scissors, but not very often.
How often do you change the blades on your craft knives?
John: A blade tends to last about 30 to 60 minutes. I need it to be absolutely sharp. If I can easily hear it cutting the paper it’s time to change the blade as the blade may start to drag slightly and tear the paper.
Christine: It varies depending on the complexity of the design. If there are lots of details I will change the blade more often, but generally I will replace it about once every 90 minutes or so.
Claudette: Precision is key, so as soon as I can feel that a blade has lost its sharpness and is going blunt it has got to be changed.
Miel: It depends on the materials, cut and the steadiness of my hands. Normally I can use a blade for several cardboard kits—around 5-10—but, if I have to cut a lot of plastic sheet (eg. for windows) the tip of the blade tends to break quicker.
EXPERT TIP: For the best results, change your craft knife blade after 60-90 minutes of use.
How do you store and maintain your craft knives?
John: To be honest, I don’t. The handle is left permanently on my work-table when not in use, but I never leave it with a blade on. I open the foil sealed blades when I use them and when they’re too blunt I remove the blade and put it in an old coffee jar.
Christine: My blades and handles live in a zipped leather case.
Claudette: I keep them stored in a wooden box with all the replacement blades.
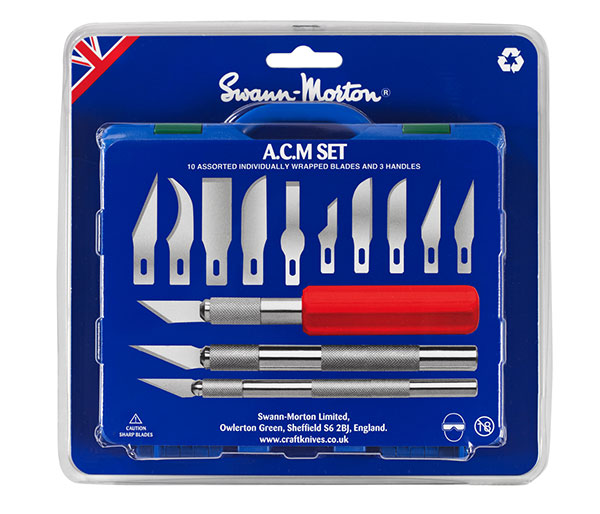
Miel: I started out with an ACM knife set from Swann-Morton several years ago and still use the original casing supplied for storage and transport.
How do you ensure that you have the best grip on your craft knives?
John: The 10A blade has a curved indentation on its lower edge. If you hold it like a pen—which it wasn’t designed for—it will cut into your finger after a while. So I use finger protection tape, which is cheap to buy online. The tape is like a plastic mesh and sticks to itself and not to your finger, so it’s easily removed. Wrap it twice around your finger where the cut would occur for protection.
Christine: I recommend investing in a squidgy, soft pencil grip—they fit neatly on the handles and help preserve my fingers from dents.
Claudette: Rubber gripping aids are quite helpful.
Miel: Make sure the handle you use is a good fit in your hands. For heavier jobs, I use the No.5 handle or even a supatool. For jobs needing less grunt, I tend to use ACM handles 1 and 2, which are easier to maneuver.


Do you use a particular technique to get the best out of your blades?
John: I don’t have any specific techniques for protecting the blades. However I would say that if the handle is worn and the blade becomes slightly loose, change the handle. Always have a secure, tight fitting blade—if the blade is loose there will be a slight movement and delay when you start to cut, which can make the blade feel like it’s blunt. This will make paper cutting work more difficult and less accurate.
Christine: I always start a cutting session with a new blade and I avoid flexing them in any way.
Claudette: I have no particular technique, just a firm grip and confidence in each cut. Learning the right amount of weight and pressure to use on your knife comes with practice and experience.
Miel: Not really, but I use fresh blades for cardboard and for work where I need to ensure the utmost precision. I will re-use older blades for rougher, less precise work.
Can the quality of your work be affected if the blade is blunt? Do you ever use a slightly blunter blade to achieve a different effect?
John: It’s impossible to produce my work with a blunt blade. It is slightly easier to cut curves with a blunter blade because the slight resistance enables you to have more control. But I’m referring to a fractionally blunter blade, not a blunt blade.
Christine: Blunt blades make cutting really hard and the edges start to look messy which is a definite no-no for paper cutting where the process is all about the clarity of the mark making.
Claudette: I never use a blunt blade, my aesthetic is very sharp, so clean lines are a must. I hate using blunt blades—if the blade isn’t sharp the cut isn’t as sharp and can often feel different to use.
Miel: Definitely. Using a blunt blade in cardboard kit building gives a rough, ‘fuzzy’ result whereas a sharp knife gives a perfect straight result.
What other tools/equipment are essential to your particular type of crafting?
John: My only tools are a Swann Morton scalpel, two set squares for cutting straight lines, and a cutting mat on a drawing board.
Christine: I use lots of layout paper for developing ideas and I cut through two layers—the first layer is layout paper showing the finalised design and the second layer is the final artwork. I also use a good cutting mat and of course good light and a stable table are also essential when paper cutting.
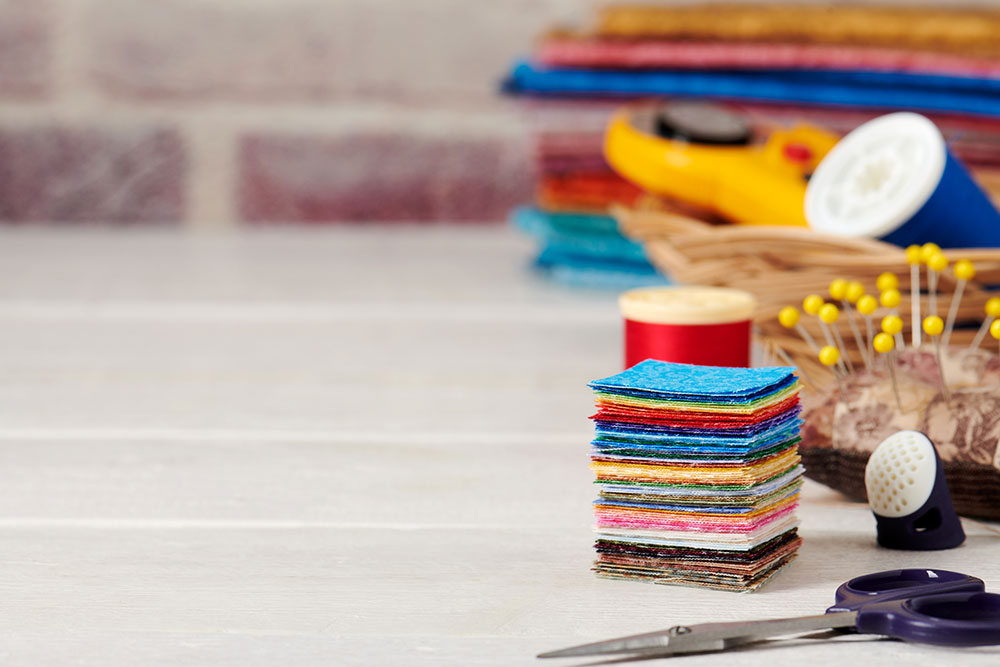
Claudette: There are lots of tools, tips and tricks you can call upon when running a small business but I’d say the tools and equipment that I use the most are: Sewing box—including needles, thread, scissors etc.—a rotary cutter and a steel ruler.
Miel: Razor saw, pliers, clamps, brushes, pin vice, dremel and accessories.
Where do you buy your craft knives?
John: https://www.scalpelsandblades.co.uk
Christine: I get mine via home delivery and buy my blades by the box—plus handles for my students—online.
Claudette: Hobbycraft.
Miel: Since using my first Swann-Morton knife, all my cutting materials come from Swann-Morton.
Tips and advice for beginners
Finally, the experts share their tips and advice for beginners who wish to begin crafting...

John’s advice for starting paper cutting
Safety first
The most important thing to think about when beginning paper cutting is safety. A scalpel is designed for surgery, and although it’s horrible to think about, there are arteries in your inner thighs that could prove fatal to damage. Therefore, if you are using a sloped drawing board as I do, you need to put something on your lap to protect you if you drop the scalpel, or if it slides off the board. I have screwed a wooden strip onto the bottom of my board to reduce the chances of the scalpel sliding off. I also bought a leather apron and cut the top off which has left me with a big rectangle of leather to put over my lap when cutting.
Master the basics
The paper cutting principle is straight-forward. Draw your design on the back of the paper in reverse. Cut it out, and then turn the paper over so you can’t see the drawing. You don’t need to spend lots of money on paper cutting courses, though no doubt they are great fun. All that is actually required is practice, practice and more practice. Allow yourself to produce terrible papercuts when you start. In fact expect it. Just keep on practising and you will inevitably become skilled.
Find the tools that work for you
Find the tool or tools that's right for you. It's easy to think that because your favourite crafts-person uses a certain tool then that's what you need to use. That's not the best way. What is right for them might not be right for you. So I would say, try a couple of tools and when you find one that you like, stick with that. I always advise to start with Origami paper, which is cheap and coloured on one side. It is also a nice weight of paper. But also try all sorts of paper: coloured, patterned and white. I nearly always use black paper because I am following a family silhouette tradition. That’s the only reason. So remember there is no right or wrong way, there is no right or wrong paper, and there are absolutely no rules. Experiment!
Develop your own style
One last point I’d like to make is that art is about self-expression. If I was beginning today I would have a quick search on the internet for papercut art, scherenschnitte, paper cutting and the like, and see all the types of things that can be done. I’d then refuse to ever look at them again—in fact I don’t! The reason is, if you take your inspiration from different media such as paintings, photography, your own drawings and doodles etc. you will evolve your own personal unique style. But if you allow yourself to constantly look at other people’s work you will end up copying them. To me that’s nowhere near as satisfying as doing your own thing!
Christine’s top paper cutting tips for beginners
-
I develop my designs using layout paper; when I have finalised a design I hinge the layout on to a piece of black paper and cut through the two layers. This results in a clean, crisp, cut that I can scan and re-size and colour. I then send off the digital artwork to the printers to create greetings cards, bags, giclee prints and tea towels.
-
There are lots of paper cut templates online and some can look very intimidating, so start with something simple.
-
You need to be relaxed. If you are uptight and find that you are gripping your knife so that you can see white knuckles that will be reflected in the cuts and they won’t flow. Also, you will get aching shoulders and hands very quickly.
-
Always start a cut with the SMALLEST elements, this helps keep the paper stable.
-
Always cut towards yourself – it may feel like it is counter intuitive but it will give you maximum control over the knife and pressure.
-
And BREATHE! I know it sounds mad but when I teach paper cutting I hear students taking a deep breath before they start a cut and then exhale in relief when the cut is finished. The concentration is extraordinary, but students often say how relaxing they find it.

Claudette’s tips for those wanting to start a small creative business
-
Know your product’s value and know your worth as a creative, small business and person.
-
Be patient but persistent.
-
Don’t compare yourself to other people or businesses—hard to do trust me!
Miel shares few important tips for all modellers
-
Start out with decent tools. You will not be able to do as good a job if you try to work with bad tools.
-
Do not expect your first projects to be perfect. The first project will be acceptable. The second will be a lot better. Then, you will think you have nailed it and you get cocky, so the third project will fail miserably! After that you will find that the quality of your work improves with every project. Eventually, you will learn your own techniques and become more certain of your own qualities and abilities and also you will find more and more tools suitable to your own use.
-
Try not to have too many projects going at one time—you will lose track and probably not finish any of them.
-
In railway modeling start out with easy controls. It is very nice to see a fully digitised and automated layout on a show, but it can take a very long time to create, and in many cases it will keep you behind your computer and away from modelling. If you have mastered the basics, expand slightly so that you can keep everything under control. Trying too much at once will not only cost a lot of money, it will cause a lot of annoyance!
-
Make sure your projects fit in your house.
-
Make sure the base of your layout is light but stable. There are several suppliers of kits for baseboards, they are a bit more expensive than building them yourself from scratch, but if you lack the carpentry skills they are your best chance of building a quality foundation for your modeling.
-
If you have the chance, join a local club where you will meet like-minded people and learn from each other.
-
Read magazines and visit shows to get enthused about new ideas.
-
Most important of all: stop thinking and start building. It is a very satisfying hobby to get into, much better the just playing computers, tablets and phones all day. Believe me it is!
Image Credits:
Thank you to our contributors for supplying imagery to support this guide.
Claudette Cooling - https://www.instagram.com/thecoolline/
Christine Green - https://www.pinterest.co.uk/craftingcottage/
John Speight - https://www.etsy.com/uk/shop/JohnSpeight
Miel Reijnen - https://www.facebook.com/one2zmodelshop
Author:
This guide was written by Swann-Morton Limited. Swann-Morton Limited is based in Sheffield, England and employs around 350 people producing 1.5 million surgical and craft blades each day. Swann-Morton surgical and craft blades are sold to over 100 countries throughout the World.